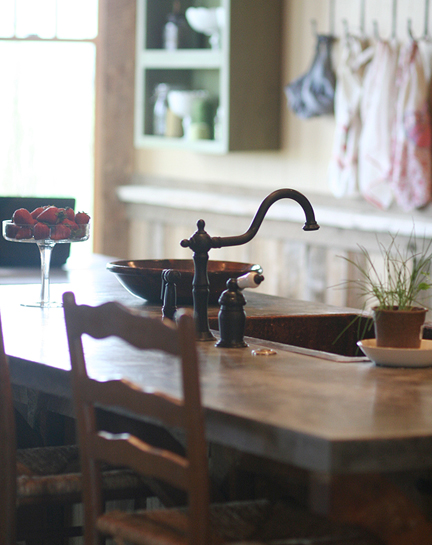
I interviewed Levi with Brother’s Concrete on our way to Portland. It went something like this:
Me(pulls up notepad on iPhone): “OK! Let’s start with a material list!”
Levi(exasperated): “Jennifer, just tell them to look it up on YouTube.” I know he is exasperated because he called me Jennifer. That plus the mean scowl he was wearing.
Me:“Oh, c’mon! It’ll only take a minute.”
Levi(and I quote): “They will need half a brain or it will turn out like crap.” (easy for a concrete guy to say)
Me: “Oh, that’s good, can I quote you?”
Levi: “Sure, go ahead.”
So on and so forth. He finally gave in when I started to randomly put down my own ignorant directions. He does have some pride.
So, this is how he did our counter.
Materials:
- 1 x 4 lumber
- 1/2″ plywood
- premixed concrete
- sealer
- beeswax
- #3 rebar
- chicken wire
- palm sander
- trowel
- screed(looked like a board to me)
Total cost of our island counter top: $90
Directions:
Levi poured ours on location. He laid down plywood for the base, then formed the sides and spot for sink, faucets, etc. with the 1 x 4 lumber. Place rebar and chicken wire. Mix concrete according to directions. Pour as dry as you can, the less water the less likely you are to get cracks. Make sure the rebar/chickenwire is completely surrounded by concrete. Roughly screed the concrete into place, leaving it a little high. Press paperless palm sander up flat against the outside of the forms to vibrate the air from the concrete. You should see air bubbles working their way to the surface. Screed flat. Trowel occasionally until desired texture. Once it has set up, lightly mist with sealer(very lightly or it will turn white and need to be sanded off). We put the sealer in a spray bottle to mist in on. Let dry 24 hours. Rub in a generous amount of beeswax. Let dry. Buff with electric buffer.
Voila!
Yeah, right, huh? If I read this I would have no clue how to construct a concrete counter top. You are probably better off checking YouTube. You can also get instruction and supplies from a concrete accessories store. I had every intention of posting detailed instructions along with the many photos I took. That was before I accidentally erased all of my photos. I promise to try harder when he does the next one. Please feel free to email me with any questions you want me to ask Levi, I love bugging him;)
How about some pictures of your cabinets? The ones in the background. They look amazing and so rustic. I still love the copper sink paired with the cement counter. I think I will hire a professional. I am in my kitchen 24/7 and will want them looking good. Yours look amazing.
Tell Levi he did a great job, I think it looks wonderful, He always did a great job for us too. We really did appreciate his hard work! Wendy
Haha!! That’s awesome!!!! Counter tops look Great!!! Strawberries look yummy too!!~Victoria W.~
http://coutureunraveled.blogspot.com
😉 lol. Love it. the countertop and the interview!
Ok, I’m picture mixing up a batch of cement and pouring it over whatever and winding up with a nice big pile of hardening cement on my kitchen floor. The new-style counters: blob shaped and shoe level.
That said, I want it, so I’ll hire someone (out here on the east coast or I’d pay your talented husband). Do you know, we live in a major metropolitan area and NO ONE would do a zinc counter for us after we saw a wonderful one in a bar in Richmond. I asked who had installed it, and they had brought someone over from France!
I showed the price tag to my husband and he lit up.